
Reliable driveway planning starts with more than choosing a color. For homeowners researching paver driveway installation in Newport Beach, start by looking at the home’s fit, the demolition plan, a stable base, controlled drainage, and consistent installation details. The finished surface depends on each of these decisions. Knowing the sequence helps you ask useful questions before work starts and understand what should be checked at each stage.
Request a design consultation or call Pacific Pavers at (714) 718-3970 to discuss your driveway project.
This guide follows the work from planning to final review. It focuses on driveway installation rather than repairs or simple surface refreshes. Each property is different, so the final layout, materials, and construction details should be based on site conditions and the approved project plan.
What should paver driveway installation Newport Beach plans include?
Begin by describing how the driveway needs to work every day. Count the vehicles that use it, consider where they turn and park, and note whether guests need a clear path to the front door. Mark gates, garage doors, steps, planting beds, utility features, and any area where a vehicle must turn around. These practical details influence both the usable paved area and the pattern.
Then look at the existing conditions. Is the current surface cracked, uneven, or holding water? Does the driveway meet a sidewalk, street, garage slab, or side yard at a noticeable slope? Are there trees whose roots or canopy affect the paving area? Photos taken from the street, garage, and side edges can help explain what you see during an initial discussion.
Before reviewing designs, note these daily-use needs:
- room for car doors to open;
- where a delivery vehicle might stop;
- whether two cars need to pass or turn without crossing planting beds;
- the walkway or entry route that matters for daily access.
A broad paved area can look attractive in a rendering but still feel awkward if the route from the street to the garage is tight. These observations give the designer concrete priorities rather than a general request for a larger or more impressive driveway.
For a larger renovation, it can help to review the home’s exterior materials and adjoining outdoor spaces together. A driveway should feel related to the entry walk and front landscape, rather than like an isolated patch. Browse the outdoor transformation gallery for examples of how hardscape materials and layouts can work across a property. The paver driveway service page is another place to review the type of project under consideration.
How do you plan the design and layout?
Design is where appearance and vehicle movement come together. Start with the driveway’s boundaries and the route vehicles actually take. A straight approach may suit a narrow frontage, while a wider turning area may be useful where cars enter at an angle. Keep the garage threshold, pedestrian route, and street connection in view. The design should make those transitions feel intentional and avoid awkward narrow strips at the edges.
Choose a paver shape, color range, and laying pattern that complement the home’s architecture. A running bond can create a directional feel, while a modular pattern can bring a more formal rhythm. Larger format units may look calm across a broad area, while smaller units can accommodate curves and transitions more readily. The pattern also affects cuts and border details, so review a proposed layout rather than selecting each element in isolation.
Consider a border or contrasting band to define the driveway edge or connect it visually to a front walk. It should be coordinated with the field pattern and the edge restraint, not treated as a decorative afterthought. If the property has a paver patio or other hardscape, compare tones and textures so the overall palette feels cohesive. For design coordination, see the company’s 2D and 3D design services.
Ask how the plan addresses the connection at the garage, street, sidewalk, and any existing concrete. Confirm where a border begins and ends, how cuts will be handled, and whether the layout accounts for visible fixtures such as drain grates. It is easier to resolve these questions on a drawing or during preconstruction planning than after the field pavers are down.
Review the design from more than one viewpoint, then settle connected details together:
- From the street: check whether the border frames the driveway and the main pattern leads naturally toward the entry.
- From the garage: confirm that the paving meets the threshold cleanly and that the turning area suits the vehicles that use it.
- In daylight: view any paver sample outdoors beside the home’s facade and existing concrete because color can change between shade and direct sun.
- Before approval: confirm the paver blend, pattern direction, border treatment, and transitions as one coordinated layout.
What Newport Beach and neighborhood details should you check?
Newport Beach properties can have different site constraints, even when they are close to one another. A sloped approach, narrow lot, established landscaping, or limited access for equipment can affect sequencing and staging. Coastal exposure also makes it sensible to discuss how the selected materials and surrounding details will perform in the property’s conditions. Avoid assuming that a material or detail is right for every site just because it appears in another project.
Newport Beach checkpoint: For a sloped or tight-frontage driveway, stand at the garage threshold and street edge before the bedding layer is placed. Ask the installer to show the intended high and low points, the route runoff will take, and how the pavers will meet the sidewalk or existing concrete. This is a site-specific review, not a substitute for local approvals or an engineered drainage plan.
Before construction, identify any homeowner association review, neighborhood design standards, or approval process that may apply. Ask who is responsible for confirming approvals and what documents are needed. Also confirm the permitted work area and how the project will meet the public sidewalk or street edge. Requirements can depend on the location and scope, so verify them with the appropriate authority rather than relying on a general assumption.
Locate or identify irrigation, lighting, utilities, and drainage features near the driveway. Discuss how access will be arranged and what protection is needed around items that remain. If construction access is tight, agree on where materials and equipment may be staged, how the garage or entry will remain accessible, and how the work area will be kept orderly.
Ask how the crew will handle the property’s existing landscape during removal and installation. A mature tree, low garden wall, gate, or narrow side passage can shape where equipment travels and where materials are placed. Agree on access routes and identify features that should be protected before demolition begins. If the new driveway changes the edge near a planting bed, discuss whether the layout needs a defined border or a clear separation from soil and mulch. This practical coordination reduces surprises and helps keep the finished edges consistent with the plan.
How are the existing driveway and site prepared?
Once the plan is approved and the work area is ready, installation begins with layout and demolition. The crew marks the driveway limits and relevant elevations, then removes the existing paving and unsuitable material to the planned depth. The scope of removal depends on the existing surface and the design. Demolition should include attention to the edges and adjacent features that are intended to remain.
Before excavation proceeds, make sure the agreed limits are clear. Protecting nearby walls, garage thresholds, planting, irrigation, and utilities helps prevent avoidable damage. If the team uncovers an unexpected condition, such as a buried obstruction or soil that differs from what was anticipated, pause to review its effect on the plan before proceeding.
Talk through how demolition debris will be removed and where the crew can stage tools and incoming material. Also clarify whether access to the garage or front door will be interrupted and how long that interruption is expected to last. A simple sequence helps everyone understand what is happening: mark and protect the work area, remove the old surface, prepare the excavation, and check elevations. If the work area meets a shared driveway or sidewalk, confirm the boundary of the active work zone so people can move safely around it.
After demolition, the exposed area is shaped to the intended elevations and slope. This is an important point to check: the finished surface needs to meet fixed edges at appropriate heights while directing water toward the planned outlet. A driveway should not be treated as a flat plane if the site requires a controlled pitch or transitions in more than one direction.
Why do base preparation and compaction matter?
The base provides the support beneath the pavers. It is built from suitable aggregate placed and compacted in controlled layers over a prepared subgrade. A useful reference point comes from the Concrete Masonry & Hardscapes Association technical note: residential driveways on well-drained soils should have at least 6 inches (150 mm) of compacted base. That is a published benchmark, not a universal specification for every Newport Beach property. Soil drainage, moisture, traffic, climate, and the approved design still determine the appropriate detail.
Compaction matters because loose or inconsistent material can settle unevenly under use. The work sequence should allow the crew to compact the prepared subgrade and aggregate base in manageable lifts. The surface is then shaped to maintain the intended slope. A well-prepared base is not simply a hidden layer: its elevations influence the paver surface, drainage, and transitions at the garage and street.
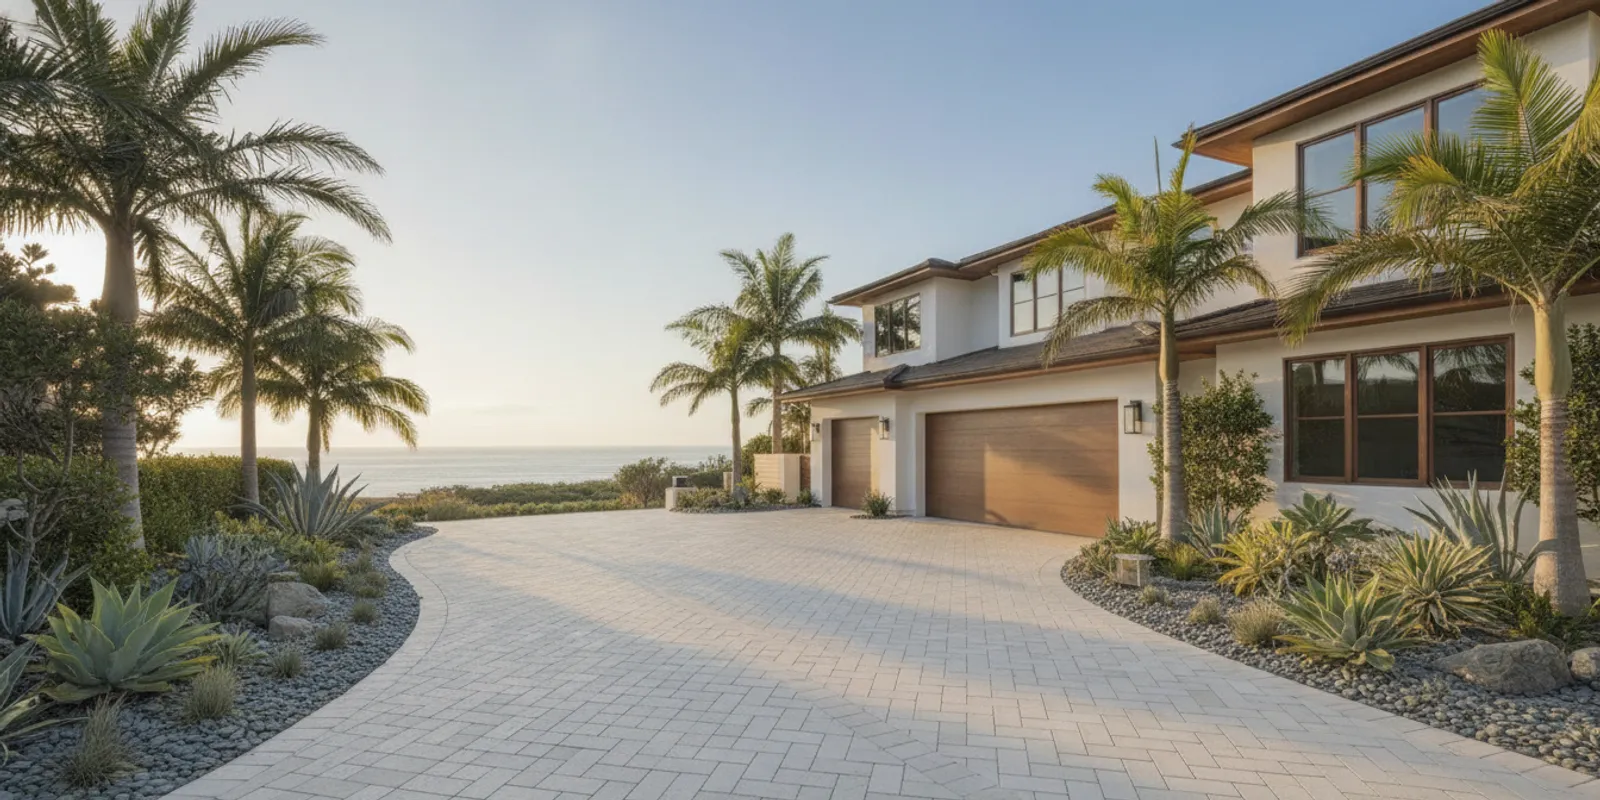
Before the bedding layer and pavers cover the base, ask what checks are part of the installation plan. Confirm that the prepared area is stable, the planned elevations are maintained, and drainage paths remain open. If you want to understand the professional context for segmental concrete pavement, the Concrete Masonry & Hardscapes Association is an industry resource; project-specific construction details should still follow the approved design and site requirements.
It can help to ask for a plain-language explanation of the build-up rather than trying to judge it by appearance alone. What ground preparation is included? What aggregate and bedding materials are specified? How will the finished grade be carried through a sloped section? The answers should connect to the property’s conditions and intended use. A well-laid paver surface cannot compensate for a poorly prepared supporting layer. So the time spent getting the base and its elevations right is part of the visible result, even though it will later be covered.
How should drainage be planned?
Drainage should be considered from the beginning, not added as a last-minute fix. The driveway layout, surrounding grades, and fixed thresholds all influence where surface water travels. Discuss how runoff will move away from the home and where it is intended to go. A design needs to account for the garage, neighboring areas, planting beds, street connection, and any existing drainage features.
During planning, ask these practical questions:
- Which direction or directions will the finished surface pitch?
- How will the driveway meet the garage threshold and the street?
- Does the plan preserve or incorporate existing drains and inlets?
- Could water be directed toward a wall, planting area, or neighboring property?
- Who should be consulted if the existing drainage arrangement appears inadequate?
Final grades should be reviewed before paving, while the base is still accessible for adjustment. Drainage grates, channels, or other components should be coordinated with the paver pattern and elevation. Don’t assume that a paver surface automatically solves a pre-existing drainage problem; identify the issue, agree on the design response, and confirm the scope before work starts.
Consider how water behaves at transitions, not just across the center of the driveway. A low point near the garage, a raised sidewalk edge, or a sloping side yard may change the path runoff takes. Ask the installer to walk through the intended flow using the proposed grades and explain how each drain or inlet fits into that route. If an existing inlet is staying, confirm it will remain accessible and finish at the intended elevation. These checks are most useful before the paving covers the prepared surface, when adjustments can still be considered as part of the planned work.
Request a design consultation or call Pacific Pavers at (714) 718-3970 for driveway guidance.
What are edge restraints, and where do they go?
Edge restraints help keep the outside courses of pavers from shifting outward. They are installed along the planned perimeter and secured according to the system and site detail. Their position matters: the restraint needs to hold the pavers without interfering with adjoining surfaces, drainage, or the intended border.
Ask how edges will be treated where the driveway meets a wall, planting bed, sidewalk, or another paved area. Some edges are visually exposed, while others are concealed by adjoining construction. The design should account for both the structural restraint and the finished appearance. If a border course is included, confirm how it will be cut and supported at corners and transitions.
Edge restraint is easy to overlook because much of it may be out of sight when the job is complete. It is still part of the installation system. The crew should follow the project detail and check that edge conditions are secure before the surface is finished.
Pay particular attention to changes in direction. At a curve or corner, the perimeter needs to follow the designed line and support the outer pavers rather than leave a loose edge. Where the driveway meets a structure, the detail may differ from an open landscape edge. Have the project representative explain those transitions and how the finished border will conceal or reveal the restraint. This is also a good time to confirm that edge work will not block a drain or create a lip where pedestrians cross.
How are the pavers laid and finished?
After the base is prepared, a bedding layer is placed and screeded to provide a consistent setting surface. Pavers are then laid according to the selected pattern, with attention to alignment, spacing, and the layout lines. The installer works across the field while keeping the pattern straight and preserving the planned borders and transitions.
Some cuts are usually needed at boundaries, around drains, and at corners. Review the edge plan before installation so cut locations and widths are deliberate. Very small or irregular pieces can be less visually satisfying, so the layout should be adjusted where practical to create balanced edges. The completed surface is compacted using a method appropriate to the paver system, then joint material is worked into the joints as specified for the installation.
Look at the whole surface as well as individual details. The pattern should remain consistent, borders should read clearly, and transitions should feel even. Drain covers should sit at the intended elevation. Keep joint material and finishing steps aligned with the manufacturer’s guidance and the approved project specifications.
During installation, compare the emerging work with the design at planned checkpoints. Confirm that the pattern direction is still correct, the border remains aligned, and the layout reaches the edges in the way agreed. Before cuts are made around a drain or fixed feature, check that its position and finish make sense with the surrounding pavers. A brief review at this stage can catch a mismatch while the layout is still being set, rather than after the entire field is complete.
Pattern choice is not only an aesthetic decision. A pattern that suits a broad rectangular field may need careful planning around a curve, a narrow apron, or a drain. Think about how the eye will read the main field and the frame around it. A contrasting border can make the outline crisp, while a closely matched border can keep the surface visually quieter. Neither approach is inherently right for every home; the best choice is the one that fits the architecture, site geometry, and agreed design.
What should you compare in the installation plan?
Use the following checklist to compare project stages and the questions each stage should answer. It is not a substitute for a site-specific construction plan, but it can help you organize a discussion with your contractor.
| Stage | What the work addresses | Question to confirm |
|---|---|---|
| Design and layout | Driveway shape, pattern, borders, vehicle movement, and transitions | Are the boundaries, garage connection, and street connection shown? |
| Demolition and excavation | Removal of the existing surface and preparation to planned grades | What is included in the removal area, and how are adjacent features protected? |
| Subgrade and base | Prepared ground and compacted aggregate supporting the pavers | What base detail is specified for this site and intended use? |
| Drainage and elevations | Surface slope, drainage features, and connections at fixed edges | Where is water intended to flow, and how will that be checked? |
| Edge restraint and paving | Perimeter support, paver pattern, cuts, joints, and finish | How are exposed edges, borders, and drainage grates coordinated? |
| Final review | Surface appearance, transitions, jointing, and site cleanup | Who walks the finished project and records any agreed follow-up? |
When comparing plans, look for clear answers rather than a single promise about quality. A useful scope describes what will be removed, what support layers will be installed, how grades and drainage are treated, and how visible edges and transitions are finished. If a detail is not yet known, ask when it will be confirmed and whether a site review or drawing is needed. This keeps the discussion focused on the work that affects performance and appearance without assuming a price, schedule, or construction specification that has not been established for the property.
How should you inspect the finished driveway?
Walk the driveway with the project representative once the installation is complete. Review it from the street, the garage, and the main pedestrian approach. Check that the pattern and borders match the agreed design, cuts are neat, and the surface transitions are consistent with the plan. Pay particular attention to drainage features and the points where paving meets existing concrete or structures.
Confirm that the work area has been cleaned and that relevant drains or inlets are not obstructed by construction material. Ask how to care for the new surface and what maintenance is appropriate for the selected materials and jointing. Keep the project documents and any care instructions with your home records. If something differs from the approved layout or needs attention, identify it clearly during the review and agree on the next step.
Use a short, repeatable inspection route:
- Begin at the public edge and walk the full perimeter.
- Cross the main field in both directions and check alignment, borders, and clean transitions.
- Inspect drain covers and the points where paving meets a wall, planting bed, existing walk, or concrete.
- Ask the project representative to explain any feature that differs from the drawing before signing off on the walkthrough.
For homeowners coordinating driveway work with a wider exterior update, the outdoor living and paving services overview and service area information provide useful context. If the project includes a connected front entry, you can also review the paver entryway service.
Request a design consultation or call Pacific Pavers at (714) 718-3970 to discuss your driveway.
Frequently Asked Questions About Paver Driveway Installation in Newport Beach
How long does paver driveway installation take?
The schedule depends on the driveway’s size, demolition needs, access, design details, site conditions, and other work being coordinated. Ask for the anticipated sequence and what could affect it. Confirm how access to the home and garage will be managed during construction. It is also useful to ask which parts of the job are weather- or site-dependent and when the contractor expects to review progress with you. A realistic sequence is more useful than assuming every driveway follows the same timeline.
Can pavers be installed over an existing driveway?
Whether an existing surface can remain depends on its condition, elevations, drainage, and the proposed construction system. Overlaying should not be assumed to be suitable. Have the site assessed and ask how the selected approach addresses the existing base, finished heights, and water flow. Added height may affect the garage threshold, walkways, gates, and the relationship to the street, so those transitions need to be considered as part of the decision.
Which paver pattern is best for a driveway?
There is no single pattern that suits every home. Compare the home’s architecture, the driveway shape, the desired visual direction, border details, and how the pattern handles edges and cuts. Review a layout before installation so the pattern and transitions are settled in advance. Ask to see how the field pattern meets the border and any curves or drain openings. A good plan considers those details as a whole rather than treating the pattern as a sample viewed on its own.
Do HOA or city approvals apply?
They may, depending on the property, work area, and applicable rules. Check with the HOA and appropriate local authority before construction, and confirm who will provide any required plans or documentation. Do not assume approval is unnecessary just because similar work exists nearby. Ask early enough to account for review time, and make sure the approved work area and street or sidewalk connection match the final project plan.
Request a design consultation or call Pacific Pavers at (714) 718-3970 to discuss your driveway.
A careful installation is the result of clear planning, a properly prepared base, thoughtful drainage, and close attention to the finished details. By confirming each stage before work begins, Newport Beach homeowners can approach a paver driveway project with a shared understanding of the design and process.

Jeff Tobin is the founder of Pacific Pavers, an award-winning outdoor living company serving Orange County, California. With a 30-person team of ICPI-certified professionals, Jeff specializes in transforming residential and HOA properties through custom paver installations, pool remodeling, and complete outdoor living spaces. His company philosophy—”Flawless craftsmanship. Clear communication. Zero stress.”—reflects his commitment to delivering premium results and exceptional customer experiences. As a BBB-accredited business and Belgard Master Craftsman, Pacific Pavers has become known for process-driven operations and elite craftsmanship in the hardscape industry.