
Most homeowners should expect their professional paver project to span two to three weeks, from the first design meeting to the final walkthrough.
Knowing how long does paver installation take is the first step in planning a high-end outdoor project. A typical residential installation in Orange County lasts between two and three weeks from the design phase to the final walkthrough. This timeline includes two weeks for planning and design followed by five to ten days for on-site work. Larger projects for communities or HOAs often take three to six weeks to complete. Factors like site size, the design style, and weather can change these plans. Our team ensures every stone meets high quality standards through a multi-point check. This careful approach prevents common issues and ensures your new driveway or patio lasts for many years. By focusing on detail and clear updates, we provide a stress-free experience that leads to a beautiful and durable outdoor space.
We have broken down the timeline phase by phase to help you prepare. for each stage of the process.
Ready to plan your project? Schedule your free design consultation and get a clear timeline tailored to your home.
How Long Does Professional Paver Installation Take From Start to Finish?
Most people ask **how long does paver installation take** because they want to plan their daily lives. For a common home project in Orange County, the full process takes about two to three weeks. This time includes more than just the work on your yard. It covers the first design, getting supplies, and the final walk-through. While larger HOA or commercial jobs can take up to six weeks, home patios and driveways move faster.
Timelines for Orange County Home Projects
When you hire a pro team, you get a clear schedule. We know you want your yard back as soon as you can get it. Our team guarantees that we will start your project within three weeks of signing the contract. The time our crew spends at your home is often just five to ten days. But the clock starts much earlier with the design phase to keep the process stress-free. We stay in touch with you through each step so you always know what comes next. It is helpful to know that the build is only one part of the job. For example, installing permeable pavements needs a base of crushed stone to manage water. This setup is key for a long-lasting surface but adds steps to the site work. Most local projects follow a standard path to ensure the best results.
The Five Phases of Your Paver Upgrade
A top-tier project follows five clear phases. Breaking the work into these steps helps keep the timeline on track. It also ensures that every detail meets our high standards for professional paver installation in Orange County. The first phase is design and planning, which often takes about two weeks. During this time, we talk about your goals and choose the right stones. Next is the pre-construction phase where we get supplies ready and set the schedule. This takes three to five days. Once we arrive on site, we spend two to three days on site prep. This includes digging out the old yard and grading the soil. The main installation phase follows, taking five to ten days. Finally, we spend one or two days on finishing touches and cleanup.
Why Planning and Design Take Time
You might wonder why the design phase takes twelve to fourteen days. This phase is where we use 2D and 3D tools to show you the final look. We want to find any issues before we start digging. This careful planning helps us avoid surprises later that could slow down the build. It also lets us show you how the colors and patterns will look in your space. During this time, we also check the slope and soil. Proper prep work is needed to prevent the ground from shifting over time. By spending time on the plan now, we can work faster and cleaner once we start the work on your lot. This approach gives you a better space that will last for years.
Phase 1: Design and Planning: The Blueprint Phase
When you ask how long does paver installation take, the clock starts well before the first stone is laid. The design and planning phase is the most vital part of the work. It often takes 12 to 14 days to finish. This time allows for a deep look at your goals and the needs of your land. By spending time on the plan now, you avoid delays and extra costs once the build begins.
Initial Consultation and Property Assessment
The first step is a clear site visit. An expert pro will walk your property to see the space. They check the slope of the ground and the type of soil you have. These things change how the base is built. They also look for utility lines and water paths. This first check takes about an hour but saves days of work later. It ensures that the project starts with a firm base.
During this visit, the team learns how you plan to use the space and studies your home’s style to ensure the new hardscape blends seamlessly with your property.
Creating Your 2D and 3D Designs
Using your site data, the team creates 2D and 3D designs that let you walk through your new outdoor space before construction begins.
The design phase is also when you fix the details. If a path feels too thin, it is easy to change on a screen. If a color does not match your home, you can swap it in seconds. This visual proof gives you peace of mind. You will know that the final result will match what you wanted. It removes the guesswork that often leads to stress during home projects.
Material Selection and Permit Planning
You will select from various stone types, sizes, and colors with guidance from the team. A driveway needs thicker pavers than a patio, and color choice affects both aesthetics and long-term appearance.
The team handles all permit applications with local Orange County cities, ensuring compliance with drainage and property line regulations. Start your journey with a design consultation.
Key takeaway: The design and planning phase takes 12 to 14 days and is the most important part of your paver project. It includes a property assessment, 2D and 3D designs, material selection, and permit planning. Investing time here prevents costly changes later.
Phase 2: Site Preparation and Base Work: Where Most of the Time Goes
The real laying of stone pavers is often the fastest part of a yard project. Most of the time goes into what lies beneath the surface. For a high-end job, site prep and base work make up about 90% of the total labor. This base ensures your new space stays level and drains well for decades. Skipping these steps leads to shifting, sinking, and cracked stones over time.
Clearing the Site
Our team removes old concrete, grass, or soil to expose a firm base layer. This step takes two to three days and is essential for a detailed paver driveway installation process that stays flat for decades.
Grading for Proper Drainage
Water damage is the biggest threat to pavers. We grade the soil to direct water away from your home, using precise tools to set a slight slope. This step is essential for professional paver installation in Orange County.
Building a Firm Base
We build a solid base with layers of crushed rock and sand, compacting each layer with heavy tools. A driveway requires a thicker base than a garden path, and we verify compaction at every stage.
Material ordering and delivery takes three to five days before site work begins. We handle logistics so you enjoy a seamless experience from start to finish.
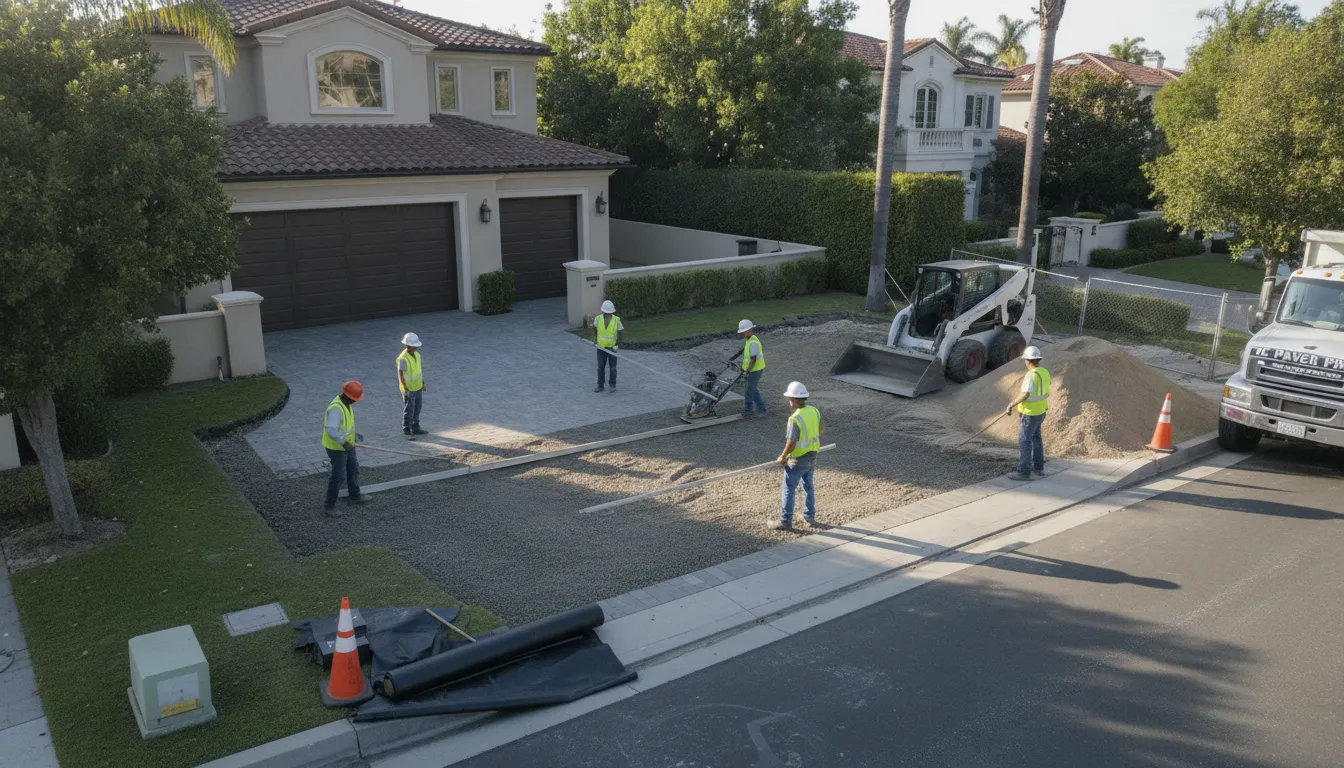
Phase 3: Paver Installation: The Fastest Part of the Project
Once the digging and base prep are done, the work moves fast. Many homeowners ask, how long does paver installation take after the ground is ready? For most Orange County homes, laying the stones is the quickest part. This stage often takes 5 to 10 days for a driveway or pool deck. A small patio may even be done in just one or two days.
Setting the Sand Bed
The crew spreads a leveled inch of sand over the compacted base, creating a smooth bed that keeps pavers flat and allows water to drain through the joints.
Our team follows California Contractors State License Board standards to ensure proper sand depth and safety compliance.
Laying Patterns and Cutting Stones
With the sand bed ready, the crew lays each stone by hand starting from one corner. Common patterns include:
- Herringbone: This interlocking pattern is best for driveways because it handles heavy loads.
- Running Bond: A simple, classic look that mimics old brickwork.
- Modular: Uses multiple sizes of stones for a natural, random look.
The shape of your pattern can change the time it takes. Simple looks go fast, but complex designs may add a few days. The crew uses wet saws to cut the pavers to fit curves. According to the Centers for Disease Control and Prevention, using water to control dust is the best way to keep people safe. You can see how this works in our detailed paver driveway installation process guide.
Edge Borders and Joint Sand
To keep the stones in place, the team sets borders along the edges. These are usually plastic or metal strips held by long spikes. They act as a hidden frame that stops the pavers from moving. Without these, the stones would shift and weeds would grow. This step is a key part of the total strength of your new hardscape.
The final touch is using polymeric sand. This sand has a special glue that sets when wet. The crew sweeps the sand into the joints. Then, they use a heavy machine to vibrate the stones. This locks the sand in and bonds the pavers together. Once we add water, the sand hardens. This stops weeds and ants from moving in, giving you a clean finish that is easy to care for.
Key takeaway: Laying pavers is the fastest phase, taking 5 to 10 days for a driveway or pool deck. The crew sets a sand bed, lays stones by hand, cuts pavers to fit edges, and locks everything in place with edge restraints and polymeric sand.
Finishing, Inspections, and the Final Walkthrough
The final phase of your project is where the small details come together to create a lasting surface. This stage usually takes one to two days. It focuses on locking the pavers in place and making sure the site is clean. If you are asking how long does paver installation take, the finishing work is the short last step in the total timeline.
Sanding, Compacting, and Sealing
Once the crew lays the stones, they spread fine joint sand across the entire surface. They then use a plate compactor to vibrate the pavers. This vibration pushes the sand deep into the joints to create a tight bond. This step is key for a detailed paver driveway installation process because it stops the stones from shifting over time. It also helps with drainage, as stable joints allow water to move away from the surface properly.
You may also choose to seal your new pavers. Sealing is not always needed, but it helps protect the colors from the bright sun. It also keeps weeds and ants from growing in the sand. If you choose to seal, the crew will wait until the surface is dry and clean. This adds a layer of protection that keeps your outdoor space looking new for many years. We use high-quality sealers that bond with the sand to keep it in place.

Multi-Point Quality Checks
A premium project needs a close look at every corner. Our team runs a multi-point quality check before we call the job done. We look at the pattern for any gaps or crooked stones. We also check the slope to ensure water flows toward the proper drains. This focus on drainage is a standard part of best practices for permeable pavements. These systems often use stone base layers to manage heavy rain. We make sure the edge restraints are tight so the stones stay exactly where they belong.
We do not just check the work once the crew finishes. We also set up a 30-day follow-up visit. This second look allows us to find any settling that might happen after the first few weeks of use. If any sand has washed out or a stone has moved, we fix it right then. This long-term care ensures your new patio or driveway stays in top shape well after the first day.
Final Cleanup and Walkthrough
Cleanliness is a top goal for every job site. Our crew removes all debris, extra items, and tools from your home. We hose down the pavers to remove dust and leave the space ready for you to enjoy. A clean site is a sign of professional paver installation in Orange County and respect for your house. We want your first time with the new space to be easy and fun. We even sweep the street to make sure we leave no mess behind.
The very last step is the final walkthrough with the homeowner. You will walk the site with the project leader to review the work. We show you how to care for your pavers and answer any questions about the 30-day check. This meeting ensures you are happy with every part of the job. It marks the formal end of the project and the start of your time in your new outdoor living area.
Key takeaway: The finishing phase takes one to two days and includes sanding, compacting, optional sealing, multi-point quality checks, and a final walkthrough. A 30-day follow-up visit addresses any settling after regular use.
What Factors Can Affect How Long Paver Installation Takes?
Many factors influence how long your paver project takes. A small patio may take a few days while a large driveway needs much more time. Knowing these variables helps you plan accordingly.
Project Size and Pattern Design
The size of your project is the first thing we look at. The total square feet of the area sets the pace for the work. A 300-square-foot patio takes much less time than a 1,000-square-foot driveway. Larger areas need more digging and more base work. They also need more time to lay every stone by hand. To learn more about big jobs, read our detailed paver driveway installation process guide.
The layout you choose also changes the time. Simple rows are fast to lay. But hard patterns like herringbone need many more cuts. Every cut must be exact to look good. Our team uses tools to make these cuts clean and sharp. This careful work is why people choose professional paver installation in Orange County for their homes. We do not rush the details that make your yard look great.
Site Access and Weather
How the crew gets to your yard is a big deal. If we can use big tools, the work moves fast. But if we must move dirt through a small side gate by hand, it adds many hours. Steep hills or tight spots also slow things down. They need more care to keep the site safe and stable. For homes on slopes, we follow federal rules for soil safety to stop any land shifts or slips.
Weather is another thing we must watch. Heavy rain can stop our work for a few days. We cannot work in deep mud because it ruins the base of the project. We must wait for the ground to dry to make sure the pavers do not sink later. Our goal is to give you a patio that lasts for many years. That means we only work when things are just right for a strong build.
Extra Features and City Rules
Adding special parts to your yard will add time to the job. A flat patio is quick to build. But adding a fire pit or a stone wall adds more days. These parts need deep base work and extra stone cuts to fit your yard. Each part must blend with the rest of the plan to look its best. We take the time to make sure every stone fits in place for a high-end look.
City rules and permits can also change your project start. Each city in the area has its own rules for home work. Some cities give permits fast, while others take more time. We handle the plan phase to help you avoid these stress points. This part of the job often takes about two weeks before the real work begins. We make sure all the forms are done right so your project can move forward without a hitch.
Key takeaway: Project size, pattern complexity, site access, weather, and extra features all affect your timeline. A 300-square-foot patio goes faster than a 1,000-square-foot driveway, and herringbone patterns need more cutting time than running bond.
DIY vs Professional Paver Installation: A Timeline Comparison
Choosing to install pavers yourself or hire a professional dramatically changes your project schedule. An expert crew can finish in days, while a DIY homeowner may spend months on the same task.
Why expert crews work faster
Professional paving contractors use heavy tools to speed up the build. They use skid steers and plate compactors that move dirt and stone fast. A group of trained workers can lay hundreds of square feet of stone in one shift. Most home jobs take only two to seven days of active building time. This speed comes from years of work and clear plans. They know how to avoid common traps that slow down most first-time builders.
A pro team also handles the design and planning phase in about 12 to 14 days. They use 3D tools to show you the final look before they start. This step keeps the work on track and prevents errors later on. Without these tools, a DIY project often stalls when a homeowner hits a tough choice. Experts can keep moving because they have a map for every step of the job.
The hidden time cost of base prep
The hardest part of any paver job is the site prep. You must dig out the old soil and level the ground perfectly. Pros use big machines to finish this in two or three days. A DIY worker often uses a shovel and a wheelbarrow. This manual labor is slow and can take several weekends of hard work just to reach the base layer. It is easy to get tired and stop when the work is this hard.
Proper base prep is needed for a floor that lasts. According to the Environmental Protection Agency, stone layers must be set right to handle water flow. Experts know how to grade the stone to prevent pools of water on your patio. Doing this by hand is much harder and takes more time to get right. If you miss a step, the pavers may shift or sink when it rains. Fixing this later takes even more time.
| Task | Professional Crew | DIY Homeowner |
|---|---|---|
| Design & Planning | 2 Weeks | 1-3 Weeks |
| Getting Supplies | 3-5 Days | 1-2 Weeks |
| Site Digging | 2-3 Days | 2-4 Weekends |
| Base Layer Prep | 1-2 Days | 3-5 Weekends |
| Laying & Cutting | 2-5 Days | 4-8 Weekends |
| Finishing & Sanding | 1-2 Days | 1-2 Weekends |
Setting realistic project goals
Most DIY projects stretch across several months. Professional crews work daily from 7:00 AM until late afternoon, finishing your project much sooner so you keep your weekends free.
Mistakes are the biggest risk to your project schedule. If the base is not flat, you must pull up the stones and start over. This rework can double your total time and cost. Reading a detailed paver driveway installation process shows how many steps are involved. Hiring a crew ensures the job is done right the first time. You get a high-end look without the stress of losing your free time for half a year.
Key takeaway: A professional crew completes a paver project in days while a DIY homeowner may take months. Pros use heavy equipment to finish site prep in two to three days, while DIY work through the base stage alone can take several weekends.
How Long Should You Wait Before Using Your New Paver Surface?
After your project is done, you likely want to use the new space. Many people ask how long does paver installation take and when they can walk on the stones. You can often walk on a new patio as soon as the team finishes their work. But you must wait a bit longer before you drive a car or place heavy items on the area. This short wait helps protect your project and keeps the stones level for years.
Walking and Placing Furniture
You can walk on your new pavers immediately. But avoid dragging heavy items like grills for the first 24 hours to let the joint sand settle and prevent loose stones.
It is also wise to keep pets and kids away from the edges for a short time. The edge stones need time to bond with the soil. If you rush to use the space, you might push the outer stones out of line. A pro crew will check these edges during the last phase of the job. This ensures your outdoor area looks great and lasts for many years.
Driving on Your New Driveway
New driveways need more care than walkways. You should wait 24 to 72 hours before you drive or park your car on the new pavers. This time allows the base and the stones to settle. Driving on the stones too early can cause them to sink or shift. This is true near the edges where the ground is still fresh. Giving the area three days of rest is the best way to keep the surface flat.
Strong driveways use a thick base of crushed rock to hold heavy cars. As noted by the EPA, these rock layers are key for drainage and strength. The base stays firm once it is packed down and allowed to sit. If you have a large truck, you should wait the full 72 hours. This prevents the weight from making ruts in the new stone layout.
Sand Curing and Sealing
Polymeric sand hardens when wet but needs 24 to 48 hours of dry weather to set properly. Check the forecast before using the area so the bond forms fully and keeps weeds out.
Wait about 30 days before sealing to allow stones to release salts that cause efflorescence. Pacific Pavers checks your stones at the 30-day follow-up to ensure they are ready for sealing.
Key takeaway: You can walk on new pavers right away. Drive on them after 24 to 48 hours, and wait a full week for heavy vehicles. Polymeric sand needs 24 hours of dry weather to fully set before normal foot traffic.
Frequently Asked Questions
How long does professional paver installation typically take?
Most residential projects in Orange County need about two to three weeks to finish. This total time includes the design and planning phases. The actual on-site work for a standard home usually takes between two and seven days. Larger jobs for groups like an HOA may take three to six weeks. According to Pacific Pavers, careful planning helps make sure that every stone is set with care and skill.
How long should I wait before driving on a new paver driveway?
You can usually walk on your new stones as soon as the crew finishes the work. However, you must wait longer before you drive a car or truck on the surface. It is best to wait at least 24 to 72 hours before you allow any vehicle traffic. This short wait gives the joint sand time to settle and lock the units into place. Waiting helps protect the long-term strength and level of your new driveway.
What factors influence the timeline of a paver installation project?
Several things can change how long your project takes to complete. The total size of the area is a main factor. Hard patterns or custom features like fire pits and walls also add time. Some sites in Orange County have steep slopes that need more work to make sure they have good drainage. According to the EPA, building a proper base is a key step that takes time but prevents soil erosion.
How does DIY paver installation compare to professional timelines?
A professional crew can often finish a home project in just a few days. If you try to do the work yourself, it often takes much longer. DIY projects often stretch across many weekends. This is because preparing the ground and laying each stone by hand is hard work. Professionals have the tools and training to do the job fast and right. Hiring an expert makes sure the work meets high standards for quality and safety.
Ready to Transform Your Outdoor Space?
Every paver project is unique, and understanding the timeline helps you plan with confidence. At Pacific Pavers, we guide you through every phase from design to final walkthrough, keeping you informed and in control. Schedule your free design consultation or call us at (714) 718-3970 to start planning your project today.