
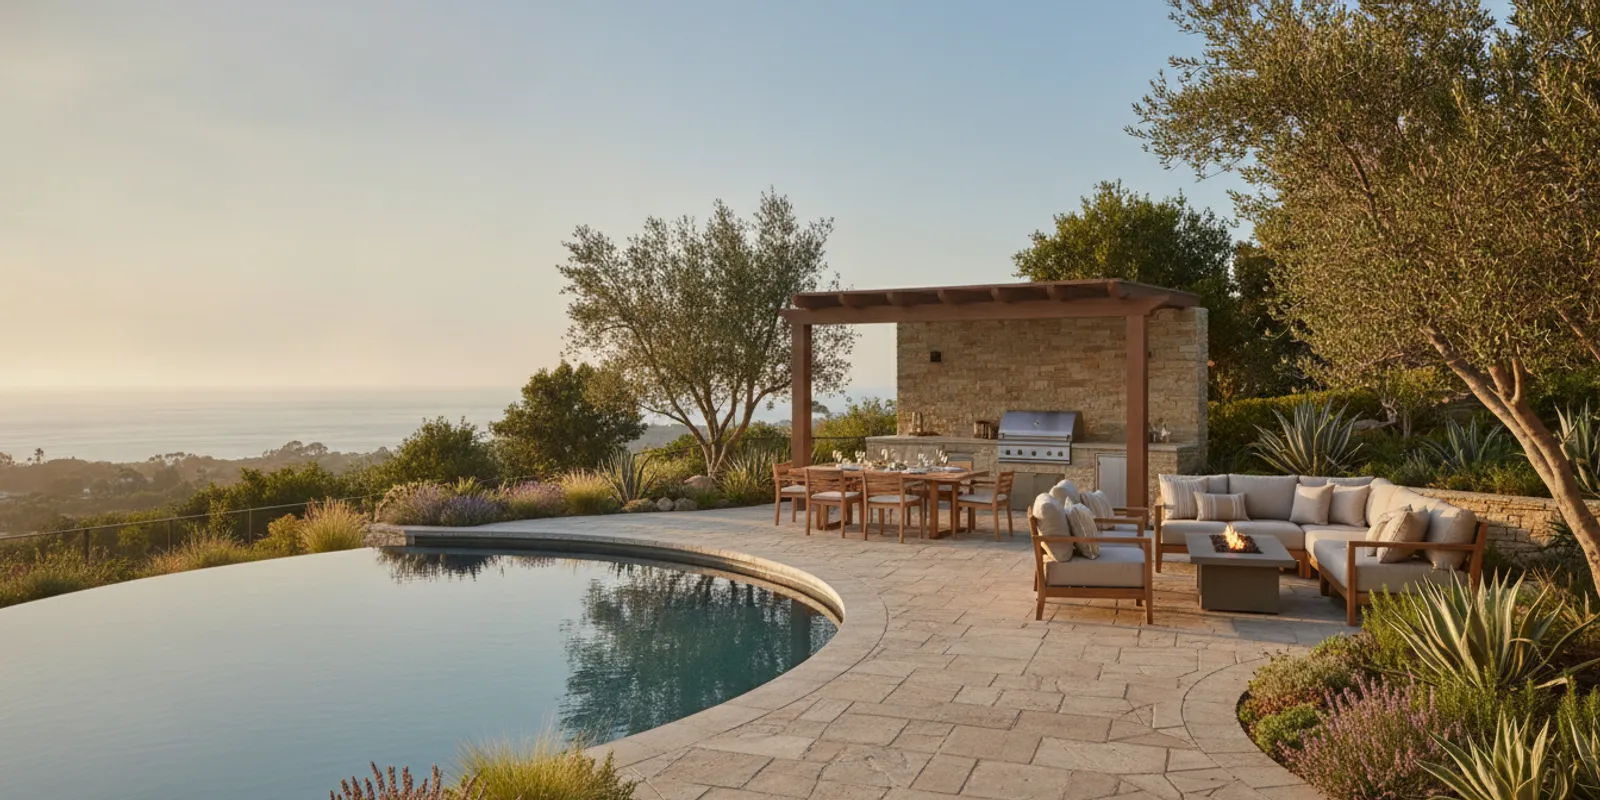
Thoughtful outdoor living design Newport Coast homeowners can enjoy starts with how the yard will work on an ordinary evening, not just how it looks in a rendering. A successful plan connects the home, patio, pool, cooking area, shade, lighting, and planting so people can move between them comfortably. It also accounts for the property’s exposure, drainage, existing grades, and any review requirements that apply to the site.
What Makes Outdoor Living Design in Newport Coast Different?
Newport Coast homes often have distinctive architecture, sloped or terraced yards, and a strong relationship to outdoor views. The best plan responds to those conditions rather than forcing a standard patio layout into the space. Start by noting the places where the home already opens to the yard, the direction of prevailing sun and wind, changes in elevation, and the views you want to preserve.
Coastal exposure also affects material choices and maintenance. Salt carried in ocean air, sun, and moisture can take a toll on outdoor finishes and metal components. Ask your design and installation team how proposed materials are intended to perform outdoors, what care they need, and whether adjacent materials are compatible. A finish that looks right in a sample can feel different across a large, sunlit surface, so compare samples at the property in both sun and shade.
Before design decisions become detailed, confirm property lines, easements, utilities, drainage paths, and any homeowner association review process. Building or grading requirements are site-specific. A City of Newport Beach staff action, for example, documents a proposed finished-floor elevation in relation to the NAVD 88 datum; this is a reminder to verify applicable site requirements rather than assume a generic detail will fit every property (City of Newport Beach staff action).
Make a simple site inventory before settling on a layout. Walk the yard at the times you expect to use it and note where direct sun falls, where wind is strongest, and which doors people naturally use. Mark existing trees, drains, retaining walls, utility access points, and views that should stay open. These observations help turn broad goals such as “more room to entertain” into useful choices about location, scale, and circulation.
How Should You Organize Entertaining Zones?
Think of the yard as a sequence of outdoor rooms. Each zone needs a clear purpose, enough space for its activity, and a comfortable connection to the next area. A typical plan might include an arrival path, a dining or cooking zone near the house, a lounge area, and a quieter place to enjoy the view. A pool can anchor the layout, but it should not interrupt circulation between the home and the other destinations.
- Daily-use patio: Place the main sitting or dining area where access from the kitchen or living room is convenient.
- Cooking and serving: Keep the outdoor kitchen connected to both indoor food preparation and outdoor seating.
- Poolside space: Provide a clear route around the pool and a place to sit that does not block the main path.
- Quiet retreat: Use planting, a change in paving, or a small shift in level to distinguish a calmer lounge from active entertaining.
Sketch the routes people will use with food, towels, or serving trays. Avoid layouts that force guests through the cooking work area or across a wet pool edge to reach seating. A design can also separate active and quieter uses without putting up a wall: orientation, planting, furniture, and paving patterns all help signal where one zone ends and another begins.
Test the plan with a realistic gathering rather than a vague idea of “entertaining.” For example, place a dining table near the serving route, then check where chairs pull back and how guests move past them. Add the likely lounge furniture and leave a route between it and the house. If the main walkway narrows whenever people sit down, shift the furniture group or rethink the zone boundary before the surface dimensions are fixed.
Also decide which activities happen at the same time. A family may want people to swim while others eat, or to have a quiet conversation while someone grills. Those uses call for separation by distance, orientation, planting, or a modest level change. A zone plan is successful when its parts feel connected but do not compete for the same path, view, or working area.
For inspiration, review a range of completed spaces in the outdoor transformation gallery, then focus on which arrangements match your home’s proportions and your household’s habits.
How Can a Patio Connect the Home, Pool, and Garden?
The patio is often the connective surface that makes the rest of the backyard feel like one plan. Its shape should follow the home’s doors, the circulation routes, and the edges of nearby features. A large rectangle is not automatically the most useful answer; a few well-proportioned areas may support dining, lounging, and pool access better than one uninterrupted expanse.
Consider the transition at each doorway. A level, clear path from indoor living space to the primary patio makes carrying meals easier. If the yard changes elevation, plan how steps, retaining elements, or gradual grade changes will connect the levels. Make sure the route remains legible at night and does not send visitors through the work zone of an outdoor kitchen.
Paving pattern and color can clarify the layout. A consistent field material gives the space visual continuity, while a border or change in direction can define a dining terrace or poolside lounge. Choose a surface with the intended use in mind, including foot traffic, furniture, sun exposure, and the need to keep walking routes comfortable. Review the relevant paver patio options alongside the overall plan instead of selecting a pattern in isolation.
Drainage needs to be addressed as part of the patio design, not after installation. Identify where water currently travels and where roof runoff, pool-area water, or new paved surfaces could send it. Confirm that planned grades direct water appropriately and do not create low spots near the home or transitions. The correct solution depends on the site, so have drainage details reviewed with the project team before construction.
When comparing patio layouts, mark the footprint of furniture and doors as well as the paving itself. A broad terrace may look generous on plan but feel awkward if a door swings into a chair or a dining set leaves no route around its edges. A narrower, clearly shaped patio can be more useful if it gives each activity room while preserving a direct path from the house to the garden.
Material samples and pattern mockups are worth reviewing in context. Look at them beside the home’s exterior finishes, pool coping, and planting rather than by themselves. Check the appearance in strong sun and shade, and consider whether a strong border will frame the space or make it feel visually smaller. The aim is a patio that supports the architecture and daily movement, not a pattern that competes with every other feature.
Where Should the Pool and Poolside Areas Go?
If a pool is part of the project, treat it as a major planning element from the beginning. Its position affects sightlines from inside the house, available patio area, privacy, circulation, and the placement of planting and shade. Draw the pool and its surrounding walking space before fitting in furniture or decorative features.
Keep the principal route from the house to the yard clear. Then consider where people will enter and leave the pool, where wet feet will travel, and where loungers or chairs can sit without narrowing paths. Think about whether a pool-facing dining area would make sense or whether the cooking and dining zone should sit closer to the home. A good layout allows each use to work without competing for the same strip of space.
Coordinate pool edges, paving, coping, drainage, planting, and any planned lighting as a single set of details. Changes in material and level should be deliberate and easy to understand. If the project includes changes to an existing pool, coordinate the hardscape plan with the pool work so the finished transitions and elevations are resolved together. See the dedicated paver pool deck information when evaluating the hardscape around the water.
Walk through a typical pool day on the plan. Where do towels and outdoor seating go? Can someone get from the house to the pool without cutting through the dining setup? Is there a place to pause without blocking the route? The answers can expose small conflicts that are easy to miss when looking only at the pool’s outline. Consider the view from both inside the house and the main seating areas; planting can soften exposed edges without obscuring a view you value.
How Do You Plan an Outdoor Kitchen That Works?
An outdoor kitchen should support the way you cook and host, not simply fill a blank wall. Begin with a short list of activities: grilling, serving, preparing ingredients, or gathering around a counter. Then map the work sequence from storage and preparation to cooking and serving. Keep enough room for people to pass without crowding the cook.
Location matters. Placing the kitchen near the indoor kitchen can make carrying supplies and dishes more direct. At the same time, orient cooking equipment and seating with smoke, wind, views, and nearby doors in mind. Confirm what utilities and construction details are needed early; coordinating them after the patio and walls are set can lead to avoidable redesign.
Counter space, storage, seating, and weather exposure should be considered together. Choose durable outdoor-rated components appropriate to the intended use and ask about manufacturer care guidance. An island can make a natural gathering point, but it should not block the route between the house, dining area, and pool. The outdoor kitchen installation page is a useful companion as you develop the cooking zone with the wider backyard plan.
Draw the work area to scale and include doors, appliance openings, and the approach from dining seats. A cook should be able to reach preparation space without stepping into the main circulation lane. If guests tend to gather around the counter, designate their side of the kitchen and keep the working side clear. You can then compare a linear arrangement against an island or L-shaped layout based on available room and how people actually gather.
Make a coordination list before finalizing finishes: utility locations, equipment dimensions, counter and storage needs, lighting, and nearby seating. Verify these details with the appropriate project professionals. The goal is not to select every appliance at the start; it is to reserve a practical footprint and avoid placing permanent features where later connections or access will be difficult.
Where Do Fireplaces, Shade, and Lighting Fit?
A fireplace or fire feature can create a focal point and extend the usefulness of a lounge area, but it needs its own place in the circulation plan. Position seating so conversation feels natural and the feature does not obstruct a principal route. Confirm clearances, fuel choices, ventilation, and applicable approvals with qualified project professionals before construction. Treat any feature as one part of the design rather than the reason to crowd the patio.
Shade can make a sunny terrace more comfortable and help define an outdoor room. Decide whether shade is most important over dining, a lounge, or a frequently used transition from indoors. Consider how a structure or canopy could affect views, daylight inside the home, airflow, and nearby planting. If the plan includes an attached or freestanding cover, coordinate its location, supports, lighting, and any required approvals with the rest of the project. Avoid choosing a structure before confirming where people need shade and how it fits the house.
Think through shade at different times of day. A location that feels comfortable at lunch may be exposed during an afternoon gathering, while a fixed structure may shade an indoor room more than expected. Use the site’s orientation and the household’s routines to choose which zone needs relief first. Then review how the shade element fits with view corridors, doorways, and the overall scale of the home.
Lighting is easier to plan when it is tied to specific tasks and routes. Use the plan to identify steps, changes in level, entrances, and primary paths that need to be visible after dark. Add comfortable light for dining and cooking, then consider softer illumination for planting or a lounge. Aim to make the space navigable without flooding every surface with bright light. Coordinate fixtures and wiring with paving, walls, kitchen components, and planting before installation so that important routes and features are not left out.
Separate the lighting plan into practical layers. Path and step lighting should help people see where to walk; task lighting should support cooking and serving; ambient lighting can make a lounge feel comfortable. Avoid relying on a single bright fixture to do every job. Discuss fixture placement, control locations, and glare with the project team so light falls where it is useful and does not shine directly into seating or the home.
How Should Landscaping Transition Around Hardscape?
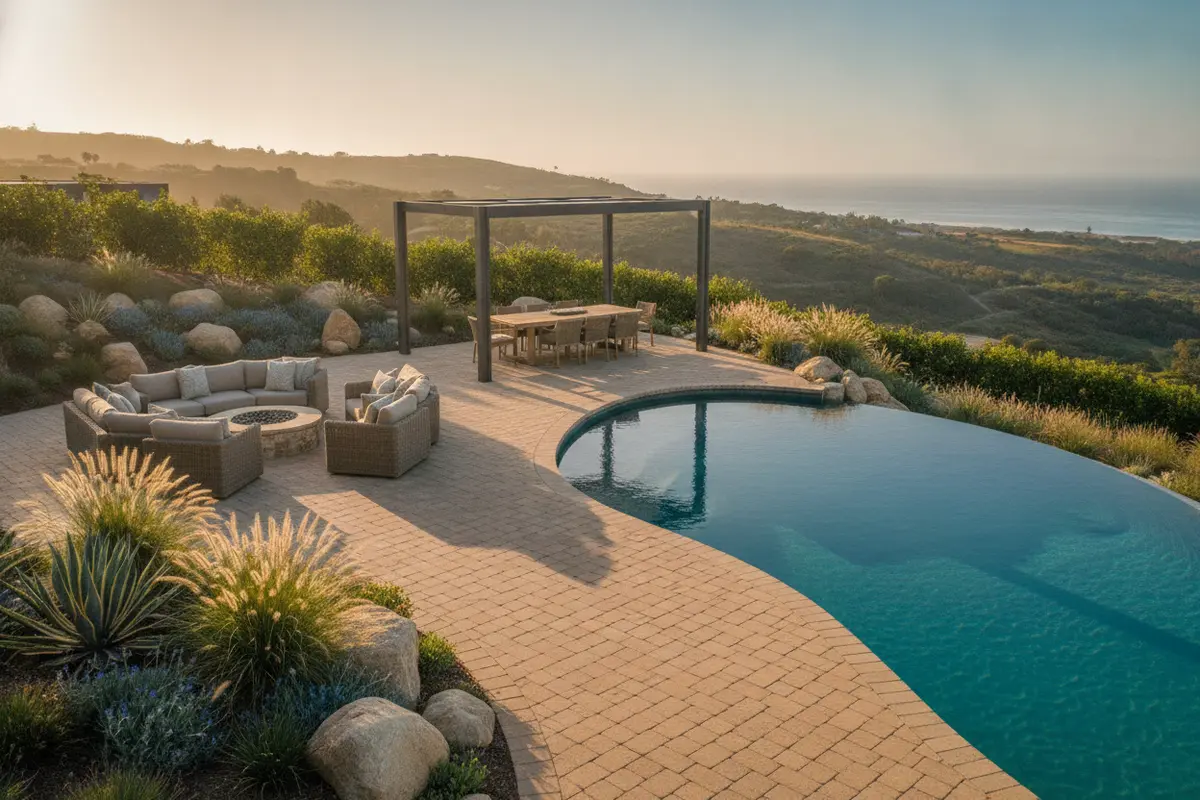
Planting softens the boundary between paving and the rest of the garden. Use it to frame a view, add privacy where needed, and give each outdoor room a sense of enclosure without blocking circulation. Check mature plant size, maintenance needs, sun and wind exposure, and irrigation requirements before setting planting locations. Keep plants clear of essential access routes and leave room to care for them once the hardscape is in place.
Transitions are especially important where paved surfaces meet planting beds, turf, a pool edge, or a change in grade. A defined edge can keep materials orderly, while a wider bed can give shrubs and small trees room to mature. Coordinate planting and irrigation with drainage so that water flows where intended. Avoid treating landscape plans as decoration to be added at the end; the location and scale of planting influence privacy, shade, views, and the feel of every zone.
Think about landscape transitions from the main viewpoints: the threshold from the home, the dining table, and the poolside seating. A low planting edge may define a room without hiding a view, while a taller planting group may screen an exposed boundary. Use a few repeated plant forms or material cues to link the zones, then vary height or density where privacy or shade is needed. Check mature dimensions so a young planting does not eventually crowd a walkway or cover a light.
Maintenance access is part of a workable landscape plan. Leave enough space to reach irrigation components, clean edges, and care for plants without stepping onto delicate surfaces or moving heavy furniture. If planting is planned near walls or paved areas, coordinate the water needs and drainage with the hardscape details. A clean transition should look intentional while remaining practical to maintain.
What Should You Coordinate Before Construction?
A multi-feature backyard project works best when its components are planned together. Before work begins, review a coordinated plan that shows the home, major paving, pool, kitchen, walls, shade structures, lighting, planting, and important grades. The goal is to find conflicts on paper: a utility crossing a footing, a step in the main path, a light in the wrong place, or a drainage route interrupted by a new feature.
| Project element | Decide during planning | Coordinate with |
|---|---|---|
| Patio and paths | Zone size, surface, transitions, and grades | Doors, pool access, drainage, and lighting |
| Pool area | Circulation, seating, and edge transitions | Pool work, paving, coping, and planting |
| Outdoor kitchen | Work sequence, counter use, and location | Utilities, shade, dining, and access routes |
| Shade or fireplace | Comfort, orientation, and clearances | Views, structures, approvals, and lighting |
| Landscape and lighting | Planting scale, nighttime routes, and mood | Irrigation, electrical work, drainage, and paving |
For a design-build project, ask who is responsible for coordinating each discipline and how revisions will be communicated. Confirm what is included in the plan, which site conditions still need verification, and how approvals will be handled. A dependable process makes decisions visible before construction rather than leaving homeowners to reconcile disconnected plans on site.
It can help to keep a decision log that records the selected materials, dimensions, color samples, and items that still need confirmation. Group decisions by dependency: drainage and grading first, then the layout and utility locations, followed by finishes and planting details. If a change is proposed, ask which other elements it affects. A kitchen shift, for instance, can change a route, light location, or planting bed even when the patio outline stays the same.
Before construction, walk the proposed routes and compare the plan with the site. Confirm where transitions and steps occur, how runoff will be handled, and whether access for installation and future maintenance is clear. Make sure questions about property boundaries, association review, and applicable approvals have an identified owner and next step. Recording open items keeps unresolved details visible and helps prevent assumptions from becoming costly field decisions.
Pacific Pavers presents itself as a design-build partner for outdoor transformations. Explore its outdoor living and hardscape services and design services to understand how planning and installation can be considered together. For location context, the company’s Orange County service areas page is also available.
How Can You Plan a Backyard Project in Phases?
Some homeowners prefer to complete a backyard in stages. Phasing can make sense when a project has several distinct areas, but it needs an overall plan first. Decide where future features are likely to go and identify any related grades, routes, utility needs, or drainage details that should be prepared before the first phase is built. A patio installed without considering a future kitchen, for example, may need to be cut or reworked to add services later.
Separate what must be coordinated now from what can be selected later. The big-picture layout, critical elevations, water management, and circulation are early decisions. Furniture, accessories, and some planting details may be easier to refine after the main construction. Ask the project team to note future connections and protect access to areas that will be developed in a later phase. This gives the completed portion a finished feel while avoiding decisions that unintentionally block the next step.
Keep material transitions in mind as well. If a later patio extension or seating zone is anticipated, record the selected surface and pattern direction so the addition can relate to the first phase. Plan temporary edges and access routes carefully so construction activity does not damage finished areas. Phasing should follow a coherent design, not leave the yard feeling like unrelated projects accumulated over time.
Frequently Asked Questions
What should I decide first when planning a Newport Coast backyard?
Start with how you want to use the space, the routes between the home and yard, and the site conditions that could shape the layout. Establish the main zones and confirm grades, drainage, utilities, and review requirements before selecting detailed finishes.
Should the pool or patio be designed first?
They should be planned together. The pool affects circulation, usable patio space, views, and drainage. A coordinated layout helps the pool edge, paved areas, seating, and transitions work as one design.
How do I make an outdoor kitchen easier to use?
Plan its location around the indoor kitchen, serving area, and seating. Map the cooking and preparation sequence, leave clear paths around the work area, and coordinate utilities and equipment before construction details are finalized.
What coastal conditions should I discuss with the project team?
Discuss sun, wind, salt exposure, moisture, drainage, and the care requirements of proposed materials and components. Also verify any site-specific planning, building, or association requirements that may apply to your property.
Can a backyard project be completed in phases?
Some homeowners choose phases, but the overall layout should account for the full vision at the outset. Planning future utilities, grades, circulation, and material transitions early can reduce the chance that a later phase disrupts completed work.
Discuss your outdoor living project
A well-planned Newport Coast backyard brings its features together around the way you live, while respecting the property’s conditions and the details that make outdoor spaces comfortable over time.

Jeff Tobin is the founder of Pacific Pavers, an award-winning outdoor living company serving Orange County, California. With a 30-person team of ICPI-certified professionals, Jeff specializes in transforming residential and HOA properties through custom paver installations, pool remodeling, and complete outdoor living spaces. His company philosophy—”Flawless craftsmanship. Clear communication. Zero stress.”—reflects his commitment to delivering premium results and exceptional customer experiences. As a BBB-accredited business and Belgard Master Craftsman, Pacific Pavers has become known for process-driven operations and elite craftsmanship in the hardscape industry.